Below is a copy of an email I sent a friend yesterday in an attempt to help her deal with malware that she recently picked up on her computer. I’m including this because malware is the most common computer problem I see and really,
every computer owner needs to be familiar with this process and be running Spybot at least once a month,
and certainly anytime there’s reason to believe the computer has picked up some sort of malware. This could come in the form of unwanted popup windows, extreme slowdowns, or any other strange computer behavior, particularly when online.
So the first part of this process is the install itself, which is only done once. But the rest of it – from the update process to the immunization process – should all be done regularly.
Then, after I describe the Spybot process, I get into some other things to check – you don’t have to take things this far unless you have reason to believe you need to. I’ve included them as a reference for you in case you do ever want to get in and do a deeper check for malware which frequently comes in the the form of browser add-ons and extensions, or even regular programs that show up in the Installed Programs list.
If you have any questions about any part of this process just let me know and I’ll be happy to help or clarify anything.
So without further ado, here’s the email transcript, slightly modified for accuracy and readability:
BEGIN TRANSCRIPT:
The next thing I’d try is a Spybot scan. If you don’t already have Spybot installed, here’s the direct download link: https://www.fosshub.com/Spybot-Search-and-Destroy.html/spybot-2.4.exe
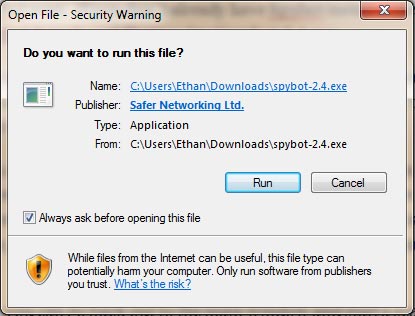
During the install process it might ask you if you want Spybot to take care of things automatically. Answer yes to that question. And if it asks you if you want to view dialog boxes, answer no (I think this happens later in the process). I can’t remember exactly how these are worded but you’ll see what I’m talking about. Everything else you can just blow past – the install is pretty straight forward.

Once installed, make sure you run the update until you have all green lights. Sometimes it will try to update but several files will fail and you’ll get a red light and it might say something like “some updates could not be downloaded”. Just hit update again. The very first time you do this it may take a while, just give it time. If it hasn’t completed within an hour or two, just exit the program and go back in and try again. For some reason, this first update has been taking a super long time the last few times I’ve done it. Next time though, the update should only take a few minutes – it’s just this first time that’s a killer. Once you have only green lights and no red lights, the update is complete.


Once the updates are all done, you can go back out to the main window and start a system scan. It will pop up a few dialog boxes here asking for access – just say Yes each time.

Once into the System Scan screen, if it asks if you want to clean up temporary files you can say yes but this will probably remove all your internet cache. It shouldn’t cause problems but you may have to re-enter login information on some websites next time you visit them.

Run the full scan and when it’s complete take note of how many items it finds, then choose “Fix Selected” at the bottom.

Once it’s done you’ll see a bunch of green check marks next to the items it found.

Close this window to go back to the main window and then choose Immunization. Again more popups about permissions – choose Yes (3 times I think). This is where that “Additional Dialogs” window pops up – choose No here.


This process is straight forward – first a system check to see what needs to be immunized, then the application of the immunization itself.


Spybot is now complete.
Once this is all done, take note of the system’s behavior for another day.
You can also check to see if you have any browser extensions or add-ons that may be malicious. In Firefox this is in the upper right – click the 3 horizontal lines, then click Addons. Check both the Extensions tab and the Plugins tab on the left – if you notice anything suspicious listed in either section, remove it. To find the extensions in Chrome, click the three little dots in the upper right, then go to Settings, then Extensions. Same check – anything suspicious? I assume you never use a Microsoft browser like Internet Explorer (don’t!) but you could check in there too, just in case. In IE, this is accessed by clicking the gear in the upper right, then “Manage Add-Ons”. Check all “Add-on Types” for anything suspicious.

Also, check in the main installed programs list to see if anything has shown up that looks suspicious. You can get there by typing into the start menu “uninstall a program” – it should pop right up. In this list, you can sort by install date so that may help you notice anything that was installed in the last few days. If you don’t see an “Installed On” column, right-click just to the right of “Name” and check the box for “Installed On” to add the column.

You could always try uninstalling and reinstalling your browsers too.
If, after all these scans and checks the system is still running poorly, it may be worth attempting a Windows Repair. We’ll cross that bridge if/when we come to it.
END TRANSCRIPT
Alright, well that’s it for this week. Next week I’ll get back to something more interesting 🙂
One further note I’ll make about this topic is that while Spybot does seem to be the best program out there for removing malware, it’s not perfect. I also use Malwarebytes from time to time to clean up anything Spybot misses. Like Spybot, it’s also free. Personally, I run Spybot about every 2 weeks and Malwarebytes every month or so. If you want to keep your computer running well, I suggest you do likewise.
I hope you’ve found this tutorial helpful and welcome any feedback. Please remember to forward these newsletters along to anyone who may find them useful. Thanks!

